I got up in the morning and separately stirred up 2 white cake mixes, which I dyed pink with red food coloring. I put one whole mix in my midsize (greased and flour dusted) stainless steel bowl. The other mix I divided up between my small stainless steel bowl and a shallow loaf pan.
I just kept an eye on all of them until they were done in the middle. The large bowl took close to an hour and the smaller ones only about 35 minutes. I let them cool off a while and then flopped them out onto my "cake board" which is just a piece of cardboard with tin foil and saran wrap over it and I spray it with a teeny bit of pan spray so I can move things around if I want.
I plopped the "body" out and then the "head" and then with the loaf pan cake I cut it up to make the legs and arms.
While the cakes were baking I whipped up my first ever batch of marshmallow fondant which seems intimidation for a total beginner but it was SO easy and fun! I melted a 10oz package of Jet Puffed miniature marshmallows in a Pyrex bowl, added 2 tablespoons of water, a teaspoon of vanilla extract and my red food coloring (3 drops I think). You stir it around a bit and then just keep dumping cups of powdered sugar in and stir and then dump another cup and stir and do that until you have what looks and feels like more of a "dough". I then greased and dusted the counter with powdered sugar, flopped the concoction out onto it and kneaded it a while until it was nice and smooth and kept adding more powdered sugar as needed. You will want to put shortening all over your hands or it sticks to them.
When it feels like a nice not-to-sticky not-too-dry ball of fun, you wrap it in saran wrap and put it in the fridge. I then went back to the cake - arranged it how I wanted to on the board, and once that cooled I frosted the whole thing with white frosting. It doesn't have to look good - nobody is going to see that part. It's just going to be used to keep the fondant in place basically.


 When that was all done, I took the fondant out of the fridge (the recipe said to keep it in the fridge overnight but come on, I am not that patient). I kneaded it a little until it softened back up enough to roll out. I rolled it with a non-stick rolling pin onto a sheet of greased wax paper until it was pretty thin but not thin enough so it was tearing. Carefully, I flopped it upside down over the top of the cake and then peeled off the paper and smoothed the fondant over the body shape. (Sorry I would have taken pictures if my hands had not been a sticky greasy mess!)
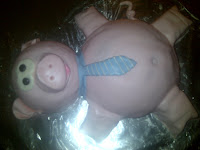
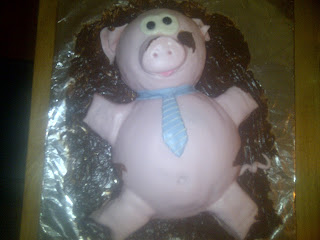
I took a knife and trimmed off all the excess and rolled that back into a ball. I made the ears, the tail, and the snout with some of that, and then I added a drop of blue food coloring to what was left and kneaded it in until it made blue fondant which I made the necktie out of.
 I decided I needed white for the eyes and tie stripes so I stuck 3 regular sized marshmallows in a bowl, tiny bit of water, and then just added powdered sugar until it was pliable just like the first time.
 The eyes are brown M n' Ms.
I used chocolate frosting for the "mud" and then dyed some white frosting green for the "grass".
It was really fun and I really enjoyed making it.
The moral of the story is don't be afraid of fondant. This kind tastes good and it was really, really easy to make and work with. I will DEFINITELY be using it again.
 |
| Finished! |

Love it!
ReplyDelete